


Since I was the one who originally posted this for Nissanclub with photos, we may as well have it here too. This is the procedure to Loc-Tite in the screws on the butterfly valves for the QR25DE.
*Tools Needed-3/8 ratchet, 10&12mm sockets, pliers, flat blade screwdriver, #2 Phillips screwdriver, 5mm hex key
*Supplies/Parts-LocTite, Brake Cleaner, clean towels, patience
*Procedure takes app. 2 hours to complete, but letting threadlocker cure for 24hrs is recommended
*BEFORE ALL ELSE-Disconnect Negative Battery Cable-10mm nut

*Photo 1-Remove engine cover, 4 bolts/5mm hex
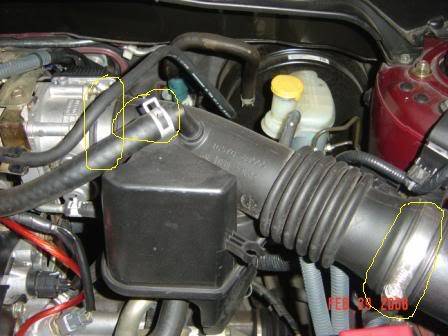
*Photo 2-Remove air intake and vent hose, 3 hose clamps, 2-10mm & 1 with pliers

*Photo 3-Remove Cam Sensor & Coolant Temp Sensor connectors, driver's side

*Photo 4-Remove Throttle connector, driver's side
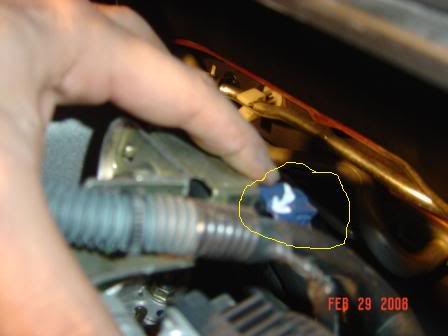
*Photo 5-Remove Purge Volume Control Valve connector, driver's side
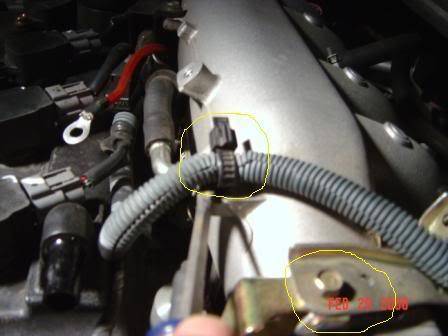
*Photo 6-Remove wiring harness, pry up on this one, needle nose for other on bracket by PCV hose
*Position harness towards front of vehicle, out of way

*Photo 7-Remove bracket above throttle body, 10mm bolt, driver's side

*Photo 8-Remove bracket above throttle body, 12mm bolt, driver's side

*Photo 9-Remove Purge Volume Control Valve hose, pliers, driver's side

*Photo 10-Remove Brake Booster hose, pliers, driver's side

*Photo 11-Remove PCV hose, pliers/twisting/cursing, driver's side
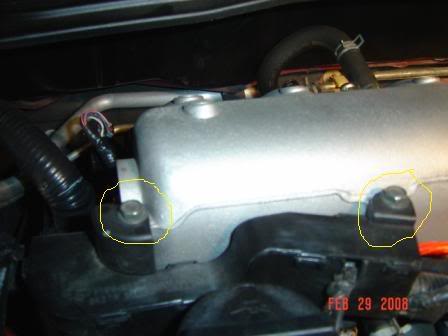
*Photo 12-Remove Wire Harness hold down, 2-10mm bolts, passenger side

*Photo 13-Remove Coil connectors, 4

*Photo 14-Remove bracket for wiring, passenger side, 10mm bolt

*Photo 15-Remove bracket, passenger side, 10mm bolt--Also remove 12mm nut for upper intake
----Position wiring out of way as much as possible, bracket can be 'hooked' under manifold
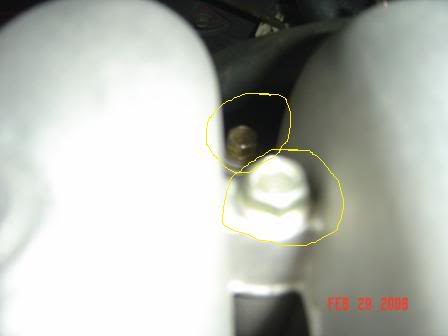
Photo 16-Remove upper intake bolts in 2 end slots, 1 long & 1 short, 12mm

Photo 17-Remove upper intake bolt in center slot(below brake booster hose) 1 short, 12mm

Photo 18-Remove nut for upper intake, driver's side, 12mm

Photo 19-Remove bolts for upper intake bracket, 2-12mm, driver's side
----Upper Manifold can now be removed, it has to clear studs on both ends and requires some manipulation

----When free, rotate towards driver's side of vehicle(See Photo 22)

Photo 20-Picture of gasket, should be reusable

Photo 21-Picture of 'Butterflies'-all 8 screws present
----Would recommend using towel (Photo21) to prevent accidental loss of screw
----Clean EVERYTHING, shoot Brake Clean on towel and wipe
----Remove one screw at a time(start from one side)
----Clean hole with QUICK shot of Brake Clean(let sit for 5 minutes or blow with air)
----Clean screw with Brake Clean
----SMALL drop of Threadlocker in hole
----Threadlocker on screw
----Reinstall screw
----Remove excess Threadlocker with towel
****Repeat above for all screws.
*Reassemble upper manifold in reverse order...
*Tools Needed-3/8 ratchet, 10&12mm sockets, pliers, flat blade screwdriver, #2 Phillips screwdriver, 5mm hex key
*Supplies/Parts-LocTite, Brake Cleaner, clean towels, patience
*Procedure takes app. 2 hours to complete, but letting threadlocker cure for 24hrs is recommended
*BEFORE ALL ELSE-Disconnect Negative Battery Cable-10mm nut
*Photo 1-Remove engine cover, 4 bolts/5mm hex
*Photo 2-Remove air intake and vent hose, 3 hose clamps, 2-10mm & 1 with pliers
*Photo 3-Remove Cam Sensor & Coolant Temp Sensor connectors, driver's side
*Photo 4-Remove Throttle connector, driver's side
*Photo 5-Remove Purge Volume Control Valve connector, driver's side
*Photo 6-Remove wiring harness, pry up on this one, needle nose for other on bracket by PCV hose
*Position harness towards front of vehicle, out of way
*Photo 7-Remove bracket above throttle body, 10mm bolt, driver's side
*Photo 8-Remove bracket above throttle body, 12mm bolt, driver's side
*Photo 9-Remove Purge Volume Control Valve hose, pliers, driver's side
*Photo 10-Remove Brake Booster hose, pliers, driver's side
*Photo 11-Remove PCV hose, pliers/twisting/cursing, driver's side
*Photo 12-Remove Wire Harness hold down, 2-10mm bolts, passenger side
*Photo 13-Remove Coil connectors, 4
*Photo 14-Remove bracket for wiring, passenger side, 10mm bolt
*Photo 15-Remove bracket, passenger side, 10mm bolt--Also remove 12mm nut for upper intake
----Position wiring out of way as much as possible, bracket can be 'hooked' under manifold
Photo 16-Remove upper intake bolts in 2 end slots, 1 long & 1 short, 12mm
Photo 17-Remove upper intake bolt in center slot(below brake booster hose) 1 short, 12mm
Photo 18-Remove nut for upper intake, driver's side, 12mm
Photo 19-Remove bolts for upper intake bracket, 2-12mm, driver's side
----Upper Manifold can now be removed, it has to clear studs on both ends and requires some manipulation
----When free, rotate towards driver's side of vehicle(See Photo 22)
Photo 20-Picture of gasket, should be reusable
Photo 21-Picture of 'Butterflies'-all 8 screws present
----Would recommend using towel (Photo21) to prevent accidental loss of screw
----Clean EVERYTHING, shoot Brake Clean on towel and wipe
----Remove one screw at a time(start from one side)
----Clean hole with QUICK shot of Brake Clean(let sit for 5 minutes or blow with air)
----Clean screw with Brake Clean
----SMALL drop of Threadlocker in hole
----Threadlocker on screw
----Reinstall screw
----Remove excess Threadlocker with towel
****Repeat above for all screws.
*Reassemble upper manifold in reverse order...
